
Cutting the Cores
 1 comment
 ABOARD THE JOIDES RESOLUTION, ON THE BERING SEA– Every core that arrives on the JR has to be split into two halves at some point in the process. Much of the information contained in the layers of mud and rock is damaged due to the invasive nature of the drilling process. To get a clean view of the core as it looked in the ground we must look at the innermost portions of the core. This means cutting it in half. Since cores can come in all consistencies, from soupy mud to hard rock. That means the technicians need to be prepared to cut a wide range of materials that come up in the core liners.
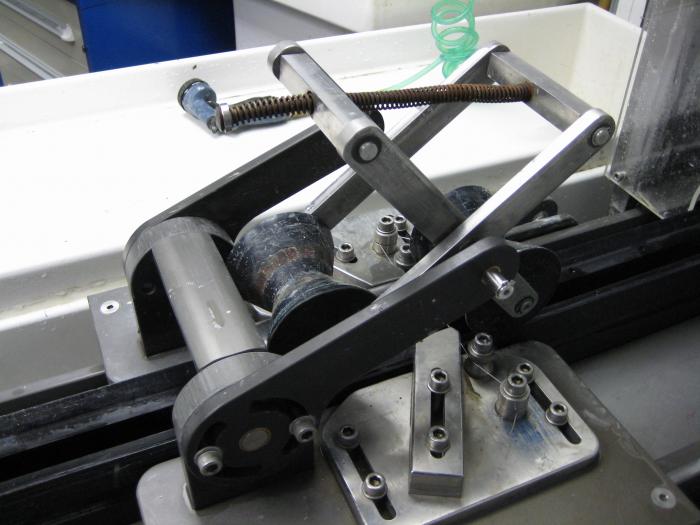
The core splitter.
The majority of the cores on Expedition 323 are mud cores. They require a straightforward procedure to cut them. The plastic core liners are placed on the splitting table and on a grooved track. The track has an motor controlled cutting tool that consists of two hooked razors that split the core liner, but are set at a depth to cause the least damage to the mud in the core. In addition to these razors, there is a thin wire that is held taught and sliced down the length of the core. It works like a big cheese slicer. After the entire liner and end caps are cut, a good tap on the table next to the splitter usually separates the core cleanly into halves. Stickier sediments may cause the halves to cling together, but a small squirt of water or even manually moving the parts with a spatula will cause them to fall apart. This video gives you a good idea of how the process goes.
We’ve been lucky enough to have some hard rocks recovered at one of our sites as well, so I was able to look at the process for them as well. First the pieces of core are cleaned of debris caused by the drilling. The edges of the core may have residue left over from the very physical nature of the coring. After the pieces are cleaned up, they are compared to one another to find out if they are continuous but broken pieces, or if there are gaps. If there are gaps plastic markers are glued in the casing to let those who observe the cores later know what was together in the ground. Often tool marks on the outside of the core can be matched up to give a definite idea of how the pieces were assembled. If the pieces are present, but might crumble or move during the cutting, a quick application of some plastic shrink wrap does the trick to hold them in place for the cutting.
Next the reassembled core is placed in the same groove as the mud cores, but the splitter blades and wire are replaced with a diamond cutting wheel assembly. The blade is slowly moved down the length of the core slicing through the hard rock. It is a noisy and dusty process. Afterwards the halves are carefully separated and cleaned to remove any dust created during the cutting. Afterwards they are left to dry, and the various pieces are labeled with tags glued onto their surface.
Hopefully you have a really good idea of how all of this works now! Next the cores go to the sampling table.


Hi Doug,
I imagine you are back in GA after your tour on the Resolution. Our team at New Jersey Geological Survey cuts 20-foot vibracores drilled in the NJ nearshore. It is phyiscally demanding and gets old when you are on your 175th core! We use a circular saw with a Ti Carbide 40-tooth blade made by Vermont American. We place the core in our own wooden jig. All our cores contain unconsolidated materials (sand, gravel, and mud). Our cores have an ID of approx 4 inches. The liners are clear PVC, probably a little thicker than the IODP core liners. WE are very interested in using the hook blade apparatus demonstrated in the video.
OUR QUESTIONS ARE: 1. Do you know if the Resolution has specs on that rig? 2) Do you know who fabricated it for them? 3) Do you know (ballpark) how much it costs to fabricate and operate? 4) If you are removed from that information, can you give me the name of someone connected with the Resolution who would have that information, if it exists? We would be much obliged, and will give you a tour of our shop whenever! Thanks so much. GREAT VIDEO! —Jane